Saturday 6 September 2014

Create beautiful things

I just made this beautiful sign for the greyville craft show. I saw a turquoise and red colour combination in a store and thought it was so striking I decided I had to try the colour combination. After searching pintrest for inspiration I came across this image. I had the sign lazer cut by Jeanene at everything lazer. She is a lovely lady and very helpful and very reasonably priced. Next I painted it red and drew my design on. I followed my lines with the foilart glue pen(all the parts turquoise first, white then red). Foiled and sealed with pratley glo. The sign was a huge hit at the show and actually was sold right off the stand! So I didn't get to keep it but atleast I can hang it here on my blog.

Wednesday 30 July 2014

Bowling party invitation

I had the wonderful opportunity of making invites for Prinaes birthday party. The specs were zebra print, turquoise and purple for a bowling party. I used my Pazzles cutting machine and pazzles design software to design the zebra print bowling pin. Then I did a print and cut of the bowling pin and ball. I then used foilart to create accents of sparkle. I love that foilart can be used just as an accent to something and it gives it that wow factor! Simple but very effective.

Thursday 26 June 2014

Clock workshop

Here are a few of the beautiful clocks done in our workshops this month! There were lots of other gorgeous clocks! Silly me forgot to take pictures of all of them.

Hearts all a shimmer

A very talented lady, called Leonie, joined me for one of our foilart classes. She has caught the craze and is running with it! Here is a beautiful piece she did with 2 hearts. She painted the 'back' hearts silver and gold, then glued the top hearts which were lazer cut filligree, on top and foiled on the 'swirls'. She then sealed it with liquid glass which is really nice for doing fiddly details. A simple project that looks gorgeous. What have you tried with foilart recently?

Tuesday 17 June 2014

The masterpiece

If any of you have been down to the East Coast Radio Garden and Home show or Hobby X you will have seen this piece being displayed. It is absolutely stunning. This picture doesn't actually do it justice. Louise Botha who is creative director for Foilart
South Africa created this piece. The detail on it is amazing! She really is a lovely lady and has really taken
Foilart to another level with her talents. She has inspired me and I hope she inspires you too!

Thursday 12 June 2014

Sweetie jar

This another great project from Lynette. I love a good ol' recycle project and this one is so simple. All you need is a tin can, sandpaper, spray paint, glue pen, foil (here she used a plain silver) and modge podge.
Simply sand the can, spray with the paint. Leave to dry. Write with your glue pen and foil. Then just seal it with 2 coats of modge podge. And hey presto a new sweetie jar.
If you have made anything with foilart that you are proud of and would like to show off  e-mail me, niki.higgs7@gmail.com and I'll post it on here. I always love seeing other peoples great projects too.

Wednesday 4 June 2014

Peacock clock

This clock is proof that foilart isn't only for children. Classy, gorgeous and unique. Do you want to give it a try? E-mail me at niki.higgs7@gmail.com for more information about the class nearest you.

Wednesday 28 May 2014

Add some sparkle

Hints and tips

Royal show

Come visit us at the royal show! It is a great day out and a great place to come and chat to us, get more stock and inspiration!

Morrocan glass bottles

Once again another project I had so much fun making. This is a little more advanced than previous projects but practise a few times and I am sure you will get it right.
You will need: a glass jar, glass stain in dark blue, foilart super-tack glue pen, antique gold foil and glass sealant.
First make sure your glass is clean. Paint the glass with the glass stain. I found it best to dab the paint on. Otherwise it was too streaky. Wait for that to dry.
Next warm your glass up, either in the oven or with a hair dryer. It doean't need to be hot just warm enough that you can still hold it. Then draw your design on with the glue pen. If you are worried about your design draw it on paper first and then place the paper inside the glass. Then all you need to do is follow the lines. Wait for the glue to go clear and tacky and then foil. Then simply seal with the glass sealant.

Friday 16 May 2014

Henna Inspired

I have been very busy lately preparing for the royal show. Which has been fantastic because it has forced me to be creative and I have really enjoyed that. I also recieved a new pack of foils and was very excited to try the white foil and all I can say is I am in love! Don't get me wrong, sparkles are awesome but it is so nice to do something matte and simple. Opens up even more doors of possibilities! The design was inspired by a client of mine who does henna. Her stuff is amazing and she is taking mehndi designs to a whole new level. You can see that on her blog here. She was asking if you could use foilart to do henna designs. So I said sure and this proves it!


Thursday 1 May 2014

Birds on a branch

I did a gorgeous project with some boys at a local school for mothers day. They decorated little jewellery hangers. These little 7 year olds really put in a lot of effort to make their birds the best. If you know boys and art this is saying a lot! I also loved that they went abstract with them and it wasn't 'how a bird has to look.' So out of 73 these are a few of my favourites.

Wednesday 12 March 2014

A rainbow of foil

I just love everything about this picture! It is a rainbow, it has all the different textures you can get in foils and it is just so bright it makes you want to smile. Inspiration for a rainbow project for sure! What inspires you to use your foil art?

Monday 10 March 2014

March workshop

I know how much you all love these coasters. So we are doing them as a workshop this week so you can make your own, Tuesday 11th of March 9am-12 at Waterfall Mica, Saturday 15th of March 1:30pm-4:30 at Inkys. There are also plain coasters for those of you that would like to do their own designs. Please e-mail me niki.higgs7@gmail.com for more details.

Monday 24 February 2014

Giftbags week: Day 5

This bag is really cute for a house warming gift. I simply drew the houses on, followed the lines with the super-tack glue pen and foiled it with the rainbow foil. Voila! A beautiful bag to give when someone is moving into a beautiful home!


Giftbag week: Day 4

I just love all those images of, birds on a wire, that you see. So I decided to do my own! I stuck a straight line of double-sided tape across the page. Drew my birds 'on the wire.' Filled in the area with glue pen. Left it to go clear. Peeled the double-sided tape off and foiled the lot. You my have to do more glue between the edge of the tape and the bird just to fill in the ridge. Look how cute they are. And they sparkle too!

Sunday 23 February 2014

Giftbag week: Day 3

Here is another floral giftbag. Also super simple but super effective. And anyone who says they can't draw should really try this one. Draw it all in pencil first because of the multiple colours. So straight line along the bottom, 3 lines up, a few leaves, a squiggly spiral for the rose, basic daisy and a tulip. Glue pen over the lines you are wanting green and gold. When it is clear, foil the gold at the top. Then foil the green. Follow the lines, you would like red, with glue pen and then foil. Simple simple simple.


Gift bag week: Day 2

You can find the quote for this on my pintrest board, foilart inspiration. If anyone knows how to make a link to a pintrest board please e-mail me. I need help! So really I just wrote the quote out in pencil and then black pen or super-tack glue pen on the parts I wanted to foil. I used the fuschia pink on the love and gold on the arrows. What quote would you put on a gift bag?

Friday 21 February 2014

A week of giftbags: Day 1

Whenever I sell a foilart pack I always give it away in a beautiful giftbag.  The only problem is I love them so much I don't want to let them go! So I take pictures of them and the natural move from there is to show you how you can make them too!
So each day I'll be posting a new gift bag and how I did it.
My first is super simple...actually they all are. I found an embroidery pattern on pintrest for my image. I just drew it out. If at this point you are saying but I'm not artistic enough for that. Then cheat! Print the image and using carbon paper trace it on to the bag. Draw over the 'flower' with your super-tack glue pen. Leave it to go clear and then foil in purple. Then repeat with the leaves and foil in green. See simple right?


Thursday 20 February 2014

Sparkles were you tinkle.

I just love when other people send me what they have done with their foilart! Lynette is a huge fan of foilart and I can see she is going to take foilart to places not even I would have thought of going! Just check out this picture of the toilet seat in her son's bathroom. How awesome it that? She did it using the super-tack glue pen and rainbow foil then sealed it with modge podge. 
She also did a set of beautiful coasters.
She pratley glo'd them to make sure the foil stayed protected.
If you have done anything with foilart that you are really proud about e-mail me a picture and I'll put it on my blog.

Wednesday 5 February 2014

A Fairytale party


Yes I know I've neglected my blog again! I'm sorry! I have been slaving away late into the nights for my daughters party. For 3 weeks I swing between, 'why do I punish myself this way?' and 'ooh this going to be awesome!' Then there is the party which seems to go by in the blink of an eye and it is over. Shame even my poor little sparkle thought it went too fast! Don't you wish you could just freeze a moment and make it last forever? Her party would be that moment for me. The kids had so much fun.
At least I managed to get loads of photos so I can replay my favourite parts and show you how I added some sparkle to her special day.
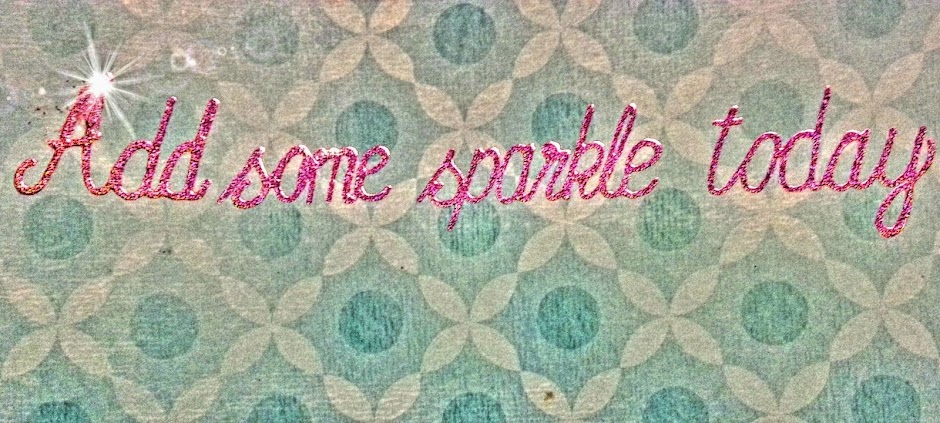
The front of her invite was sparkled by spraying adhesive on the edges (block the middle with some paper so you don't make the whole picture sticky). Then I foiled with salmon pink. The back I just printed out the words and oh so carefully went over with the glue pen and foiled in turquoise.


Her theme was fairytale so very broad. Last year we 'built' her garden so most people had seen it already so to turn it into something 'new' I just renamed each section with little signs on stakes and pictures I found here.The pictures were easy I just printed, added touches of foil and then laminated. 


The signs I wrote out with glue pen and foiled.


 I experimented with the 'mermaid cove' by writing out the whole word then I foiled the top half one colour, the bottom another colour.
On the food table, I gave my PERFECTionist husband the task of making a pirate boat out of watermelon.He did an amazing job and everyone was super impressed. For the sail I laid double sided tape down in strip and foiled with Salmon pink. I drew the R with the glue pen and foiled with turquoise. If anyone doubts the ship belongs to a pirates. The letter on the front is pronounced aRrrgh!haha!

I saw this cute picture here at catch my party, can I just say if you need ANY ideas for ANY party this website is the place to go for inspiration. So I measured my cones, foiled them flat then wrapped them up to glue and added the tails. I was really chuffed with how this turned out and worked so nicely because the children could just carry their cone with them all around the party munching away rather than all hovering round the kiddies table.
Now for some not foiled but totally amazing, excuse me while I brag pictures.
I made these cupcakes, placed them upside down then iced them, and placed marshmallow fondant (first time I used it, I will never buy fondant again), cut a slit and put a picture of my little sparkle in the top so it looked like she was in a princess dress. How cute is that? Well I thought they were gorgeous..until my sister in law, yes also Nikki, arrived with the cake...I was speechless!It was beyond amazing! 


Then my friend Nicole (the talent must be in the name ;) ) arrived and she had made Little Sparkle a beautiful princess dress. I'm so grateful to be surrounded by such amazing people. My mom worked so hard making the garden gorgeous and the night before she came down and helped me by just cleaning up all around me as I ran around like a chicken with my head chopped off. Don't lie you know you feel like that the night before a party too! And of course we were blessed with the perfect weather!
So now you know why I have been MIA! Do you think it was worth it? This week I'll be posting  Valentines cards and how to decorate a table for a romantic dinner for two. Keep coming back to learn more and be inspired.

Tuesday 14 January 2014

coral and gold nails

I have been dying to try foil art on my nails and I finally had the chance this week. It is so simple just paint your nails, in this case I painted them coral. When the nail polish has gone tacky lay your gold foil across at an angle or if you would like a french tip effect, lay it straight across the tip. Press down firmly making sure not to smudge the polish. Leave it to dry for about 5 minutes and then peel it off. One coat of clear varnish on top and it is done. They are so pretty I keep finding myself staring at the sparkle. Just like a starling. I just love me something shiny! Haha! Oh and please don't look at my hands. Bleh! They just don't do the foil art justice. Anyone willing to be my hand model?
So now you have even more things to foil and you can take your sparkle everywhere with you. What do you think? Are you going to try it on your nails?

How do you like dem coasters?

I made these coasters a while back to demonstrate that foilart can be used on mdf. You would know that already if you have seen us at one of the markets. Wow! It is by far one of my most popular products! Everyone asks about it. So I thought I would show you how I made it, step-by-step.
You will need: Laser cut mdf coasters, super tack glue pen, Dark pink confetti foil, Purple glitter foil, Turquoise sparkle foil and silver pinstripe foil, high gloss varnish or Pratley glo.
So when you start with your coaster it will look like this. I recommend taking a pencil and writing on it gently which parts you want which colours. It helps you get the colours evenly balanced and helps you remember which parts you wanted which colour.
 Next, fill in with the glue all the parts you want dark pink. Make sure you get glue right up to the edges. Leave it to go clear and tacky. Place your dark pink foil over and press firmly. Make sure you 'catch the sides'. Keep repeating this step with each colour. In this picture you can see I had foiled everything but the silver.
Last step, seal it. This is so important especially with a coaster. The foil is delicate and can get scratched easily. You don't want you work ruined when you have put so much effort into it.
There you have it. Look at that gorgeous sparkle and shine. If you would like to order these coasters plain or ready-made please e-mail me for details.

Simple yet Sparkly

I saw this here


 and was inspired to make this.

It was super super easy and really so gorgeous.
You will need: Canvas, pencil, Super tack glue pen, Antique gold foil, dark pink confetti foil and high gloss varnish or modge podge.
Draw your words on. As you can see my sparkle is almost an exact replica of their sparkly and the rest I just wrote in cursive.
Next draw over all of the parts you would like to be gold, with the glue pen. Leave it to go clear and tacky. Then foil it. Make sure it is covered completely. Anywhere that is still sticky will catch the pink when you lay it over.
Repeat with the glue and the dark pink foil on the rest of the words.
Next step is to cover it with a coat of sealant to protect it. Mine is part of my market display so it will really be man handled so I needed it to be coated well so it doesn't get dirty or scuffed. I did 2 coats of high gloss varnish. Next time I think I will try something more matte so it still has that canvas look to it. Otherwise I'm very proud of my new wall hanging.
I hope you have a super sparkly day and remember to keep foiling.

Connect with me

Yes yes I know, I haven't posted in a while. Does anybody else feel like they are behind on the year already??? Crazy! So I'm catching up tonight and putting a few things on. When it rains it pours right? So I now have a page on facebook called foil art kzn-add some sparkle today. If you 'like' the page you will get more foil art inspiration via fb. I'm also on Instagram 'alliseearoundme' I like to put pictures of foil art things I have done that I didn't do step by step instructions for on there.If you have done some foiling you want to brag about. You can put it on Instagram with the label #addsomesparkletoday so I can see it too. Who knows maybe you can even become a guest blogger right here ;) And last but certainly not least my favourite place to waste time, learn new things and be inspired...Pintrest! Sigh whoever created Pintrest is my hero! I'm an addict!Search for me at Niki Lewis Higgs and you will find my Foil art board (and loads of other things I'm into) which has things you could tweak and make better with Foil art. As Foil art pioneers there isn't really much out there. Trust me I've looked! So we have to do it ourselves. Thus why the pins aren't how to foil but rather ideas of what you could foil. I read a quote the other day that goes 'good artists copy, great artists steal.' That is what we will do, take what we love and change it into something new and even better! So now you know how I spend my spare time. Feel free to chat to me I'm here to help anyway I can and now we can connect in so many ways too!

Saturday 4 January 2014

What went wrong?


I've been getting a lot of questions from people saying, their projects are not working what are they doing wrong? So here is a list of the biggest mistakes people make, get this right and your projects will be gorgeous.
First big mistake
Not thick enough: When the glue comes out the pen it must be blue. If it is coming out and is clear it is too thin.


See the line at the top? Lovely and blue. Line at the bottom, the only place that is thick enough is the right end. So make sure it comes out thick enough. Extra tip: The thicker you make it the more of an embossed look you get. So press a bit harder and slow to have more glue 'pour' out.
Leaving it to go tacky and clear: This one shouldn't be hard. The pen is specially designed with a blue indicator. When it is blue it's not glue. It must go completely clear. If you have loads of time and enjoy watching paint dry. You would know it goes from blue, to dirty grey, then clear. Only foil when it is clear. If you are an impatient kind of person, like I am, it helps to do more than one project at a time. So while one dries you can work on another project. Extra tip: Placing it in the sun or blowing air from a hairdryer on it really speeds up the process.


Colour side up: When you place the foil on the glue the colour side must be facing up.


Patchy edges: The foil is convex so you need to press down the edges of your line. If you roll the soft side of your fist over the foil. It 'catches the side.'


Why is it when you try to do something the wrong way it seems to come out best? Well that is what seemed to happen with shot. Sorry if it is not the best example. In this Picture the dot on the left wasn't evenly foiled. You can just make out the glue still showing on the bottom edge. Where as the right dot has a perfectly clear edge all around. Extra tip: If you peel your foil away and you do find it is patchy because of not enough pressure. Just take your foil and place it over the area and press again. This will touch-up any patchiness.