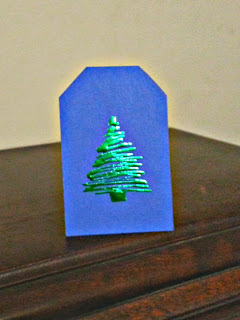
I like to think of this one as a Christmas tag because it is more effective when it is smaller. If you do want to do this on a card maybe mat it first and place it on a bigger card that has more sparkle on it to.
I have received a lot of compliments on this one. Which just goes to show simple can still be gorgeous.
You will need: card in a colour of your choice (I used dark blue because I think it looks elegant), scissors, a punch, super tack glue pen, green foilart foil.
Cut your tag (I did 9cm x 6cm) chop the corners off and punch a hole in the top ( I know, I know I forgot to punch mine.)
Starting with your glue pen, where you want the top of your tree to be, draw a zigzag that gradually gets wider to the base. I find the quicker you go the better it looks.Then draw and fill-in a little square below, for the trunk. Leave to dry, about 10-15minutes. See here in this picture you can see dark blue and white patches. The dark blue is ready the white isn't. Wait until it has all gone clear then wait an extra 5 minutes for good measure.
Place and press the green foil over the glue. Rip it off, to reveal your sparkly Christmas tree.
You can if you like go back with your glue pen and draw a star above and dots for baubles on your tree and then foil in other colours. All depends on how much you love to 'add some sparkle.' What are you making with your foilart?


No comments:
Post a Comment